

Twix Cookie Cups Recipe
Craving a Treat? Try Twix Cookie Cups!
Are you looking for the perfect sweet treat to satisfy your cravings? Look no further than Twix Cookie Cups! These delightful little treats are sure to hit the spot and leave you wanting more. With a crunchy cookie base, gooey caramel filling, and creamy chocolate topping, these Twix Cookie Cups are an irresistible indulgence that will have you coming back for seconds. So why wait? Treat yourself today with this delicious dessert that is guaranteed to please your taste buds!
This inventive twist on the beloved candy bar will satisfy your sweet tooth with every bite. Join us as we delve into the world of Twix Cookie Cups, from their inspiration to how you can easily recreate them in your own kitchen. Get ready to indulge in a delightful fusion of cookie and candy – let’s bake up some magic together!
Back in 1967, Twix was born in the United Kingdom under the name “Raider” before it underwent a rebranding transformation into the globally recognized treat we know today. The clever combination of crunchy biscuit, gooey caramel, and smooth milk chocolate quickly captured the hearts (and taste buds) of sweet enthusiasts worldwide.
Over time, Twix has solidified its place as a go-to snack for those craving a perfect balance of textures and flavors. Its iconic twin bars packed with delicious layers have become synonymous with indulgence and satisfaction.
Whether enjoyed alone or shared with others, Twix remains an enduring favorite among candy connoisseurs everywhere. The legacy of this timeless treat continues to stand tall in the ever-evolving world of confectionery delights.
The idea of creating Twix Cookie Cups came from wanting to elevate the classic flavors we all know and love. By turning them into miniature cups, each bite becomes an explosion of sweet perfection. It’s about adding a fun twist to a familiar taste, giving you something special to enjoy anytime cravings strike.
With just a few simple ingredients and some creativity, you can recreate the magic of Twix in cookie cup form. Whether it’s for a special occasion or simply as a treat for yourself, these delightful goodies will surely satisfy your sweet tooth.
When you make Twix Cookie Cups at home, you have the freedom to customize them to your preferences. You can control the quality of ingredients used and adjust sweetness levels according to your taste buds.
On the other hand, store-bought Twix Cookie Cups offer convenience and quick gratification. They are perfect for those moments when you’re craving a sweet treat but don’t have time to bake from scratch.
Homemade cookie cups may take a bit more effort, but the satisfaction of enjoying something made with love is truly unbeatable. Store-bought options provide consistency in flavor and texture that many find comforting.
Twix Cookie Cups are a delightful treat that combines the classic flavors of Twix with a fun twist. Whether you enjoy making them from scratch at home or prefer the convenience of store-bought options, there’s something special about indulging in these delicious treats. With the right ingredients and a little creativity, you can personalize your Twix Cookie Cups to suit your taste preferences.
So go ahead, get baking and treat yourself to these irresistible cookie cups. Enjoy your sweet creation and savor every bite of this unique dessert that is sure to satisfy any craving!
Ingredients Needed for Your Twix Cookie Cups
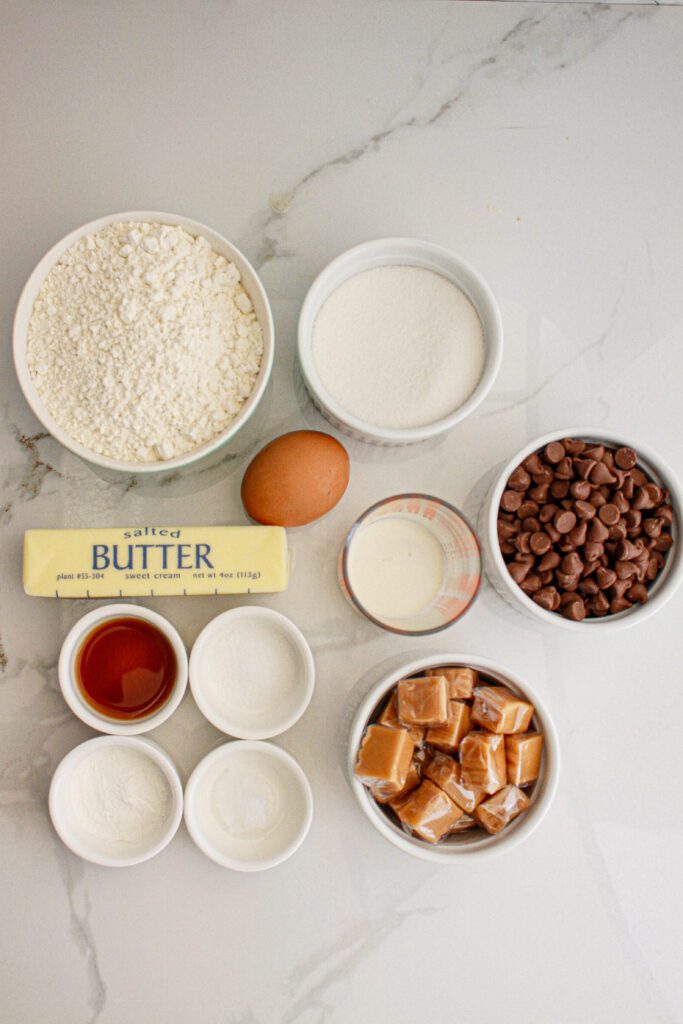
To create these delicious treats, you’ll need a handful of simple ingredients, each playing a crucial role:
- Butter & sugar – These create a tender, buttery cookie base with just the right amount of sweetness.
- Egg white & vanilla – The egg white adds structure, while vanilla enhances the flavor.
- Salt, baking powder & flour – These dry ingredients provide stability and a light texture.
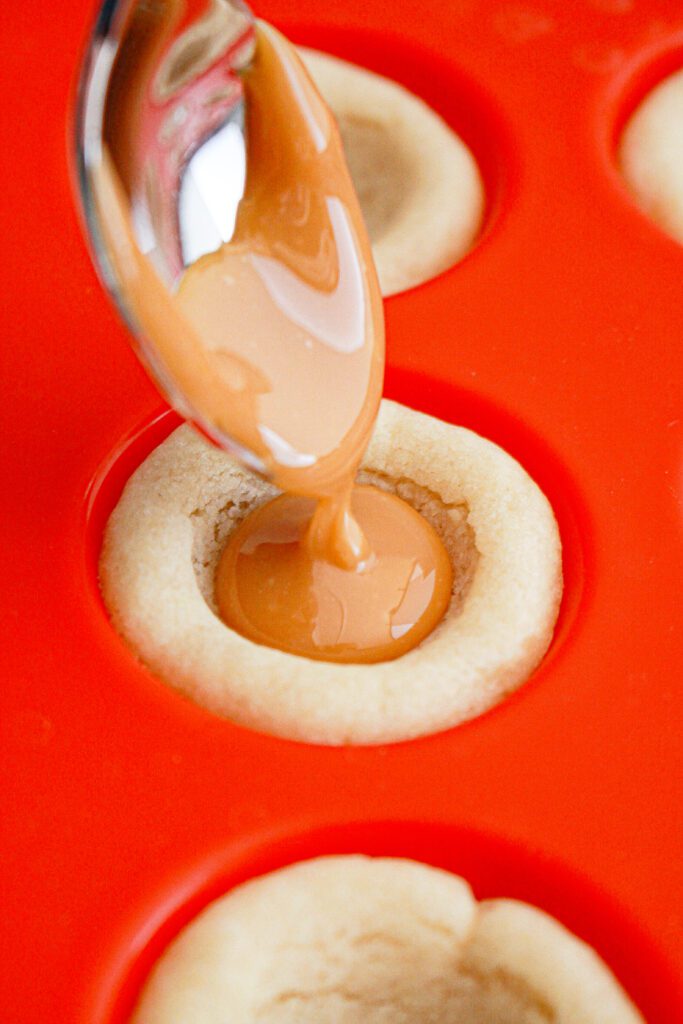
- Caramel squares & heavy cream – The caramel filling is rich, creamy, and perfectly gooey.
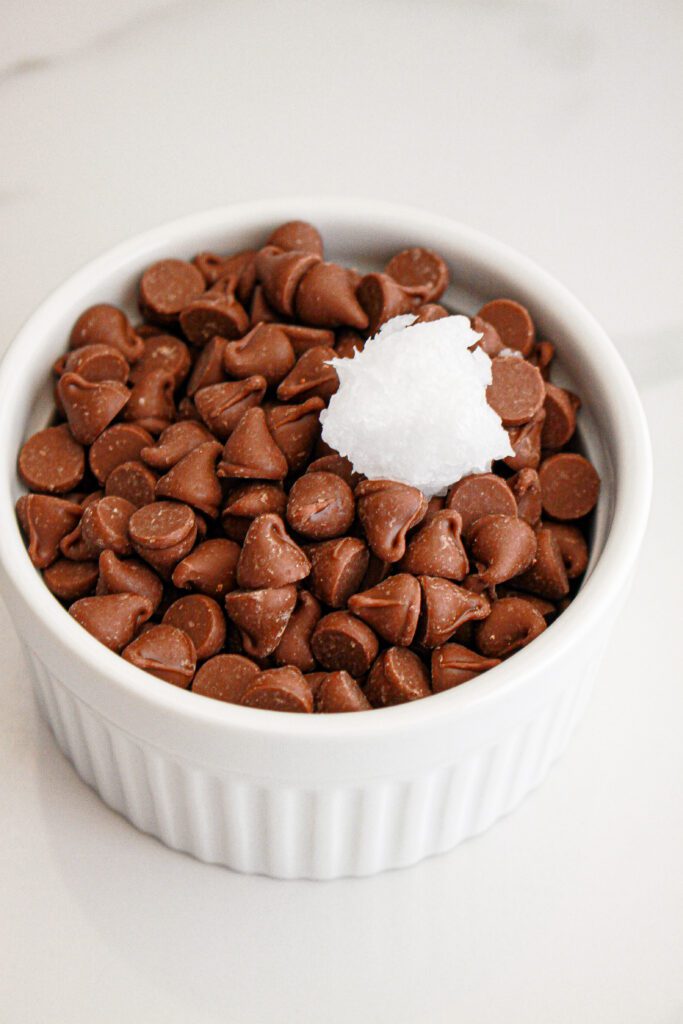
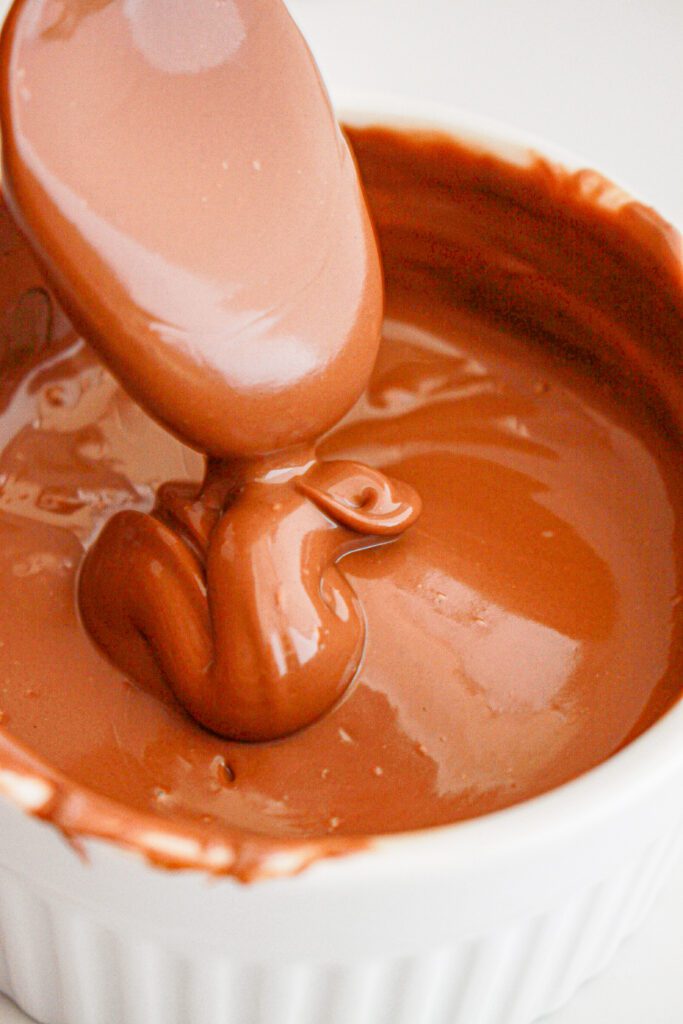
- Milk chocolate chips & coconut oil – The final chocolate layer gives these cookie cups their signature Twix-like finish.
Instructions for Your Twix Cookie Cups
Making these Twix Cookie Cups is easier than you think! Here’s how:
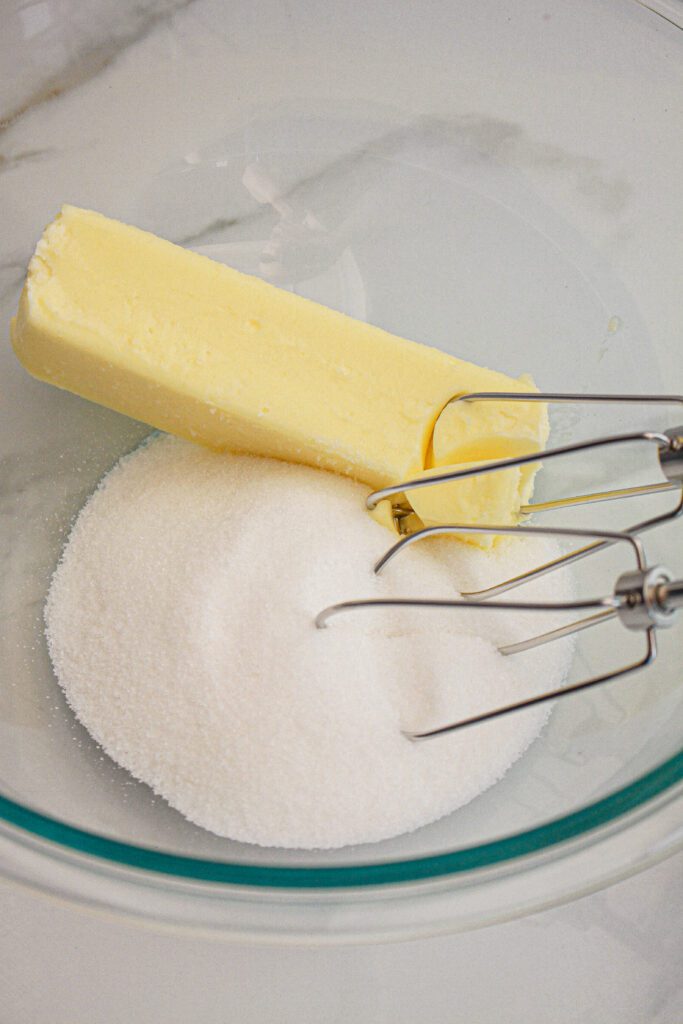
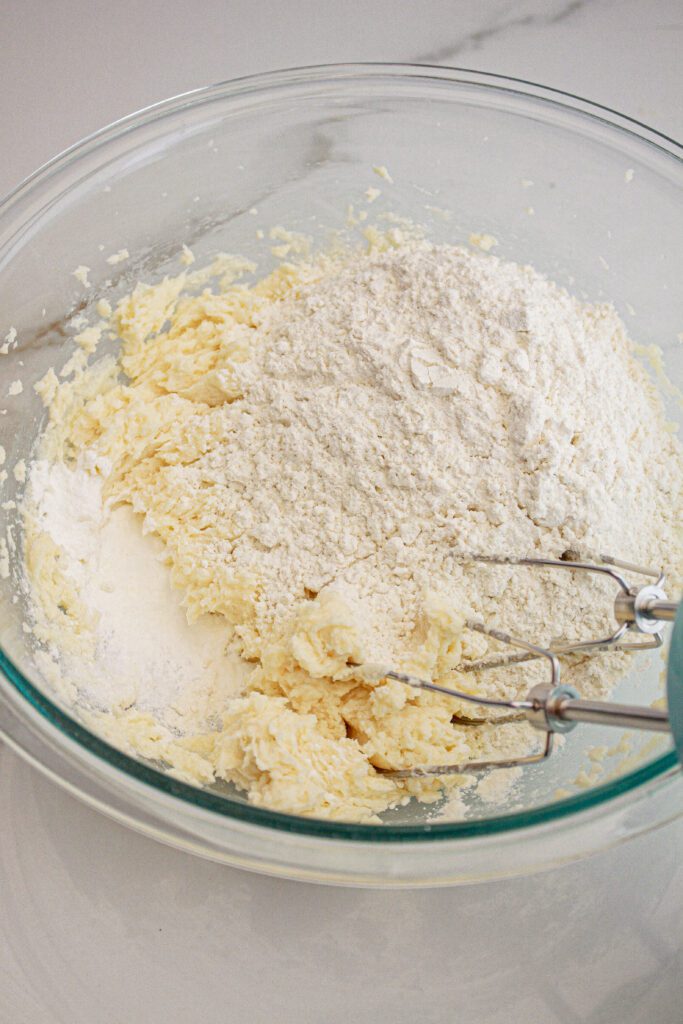
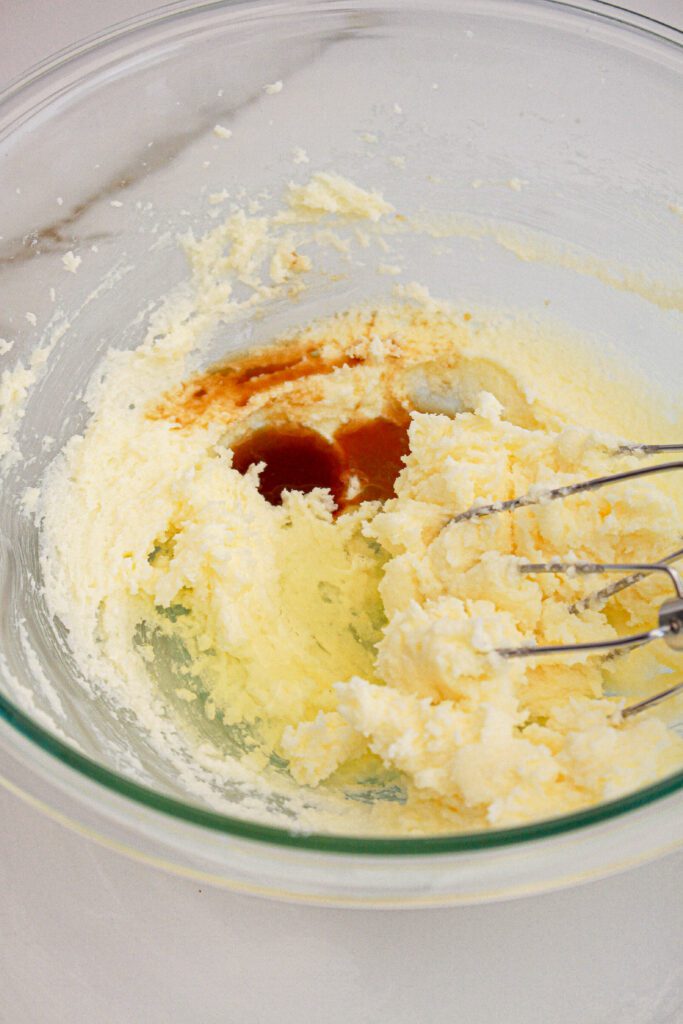
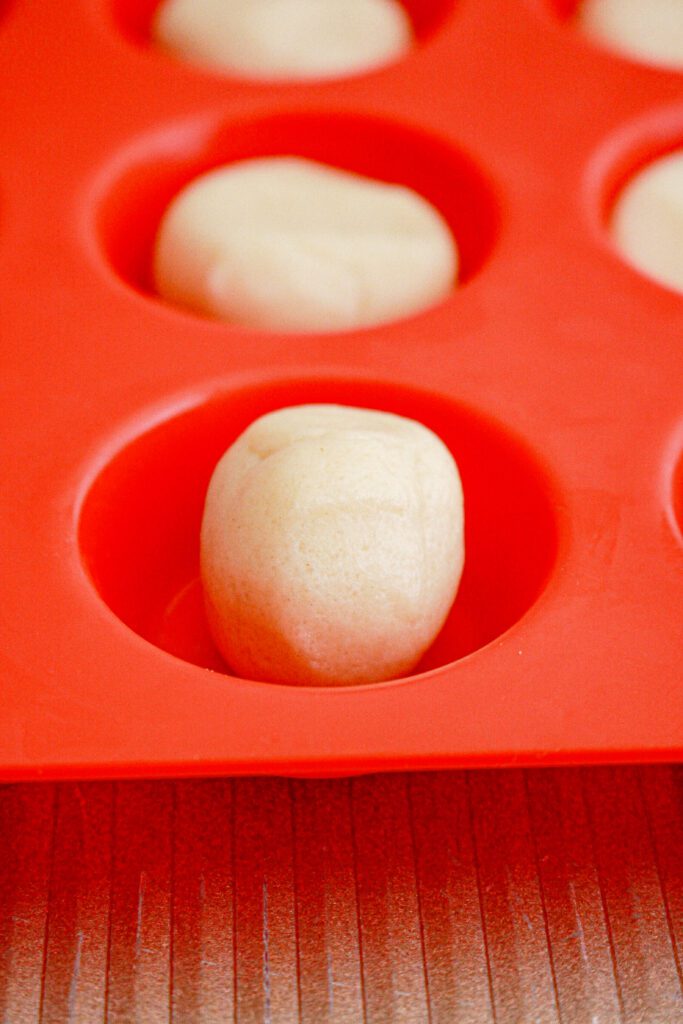
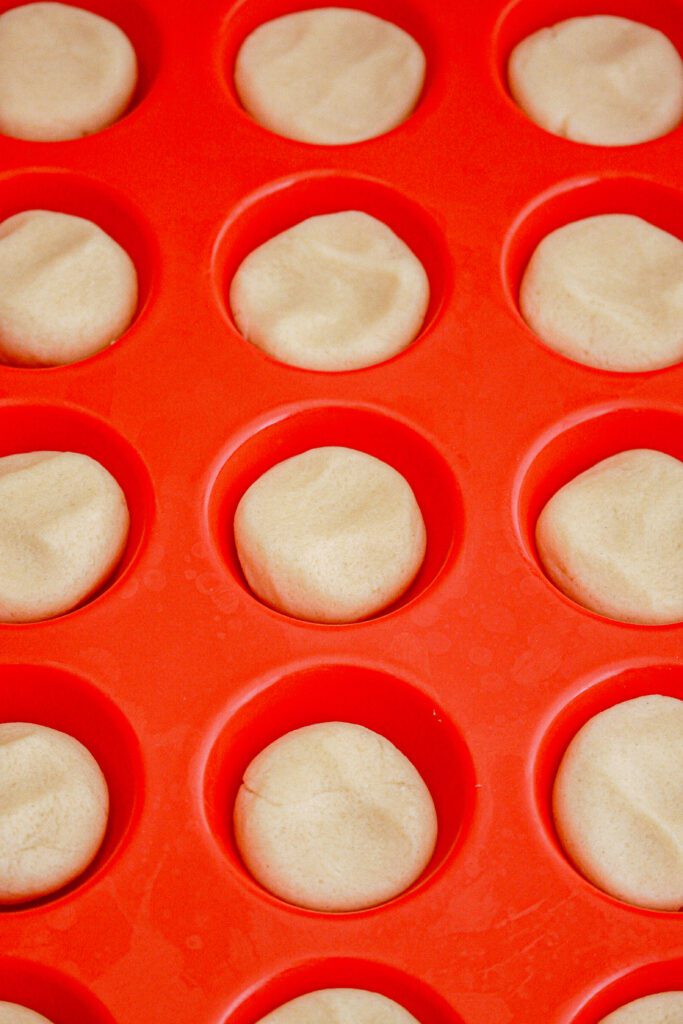
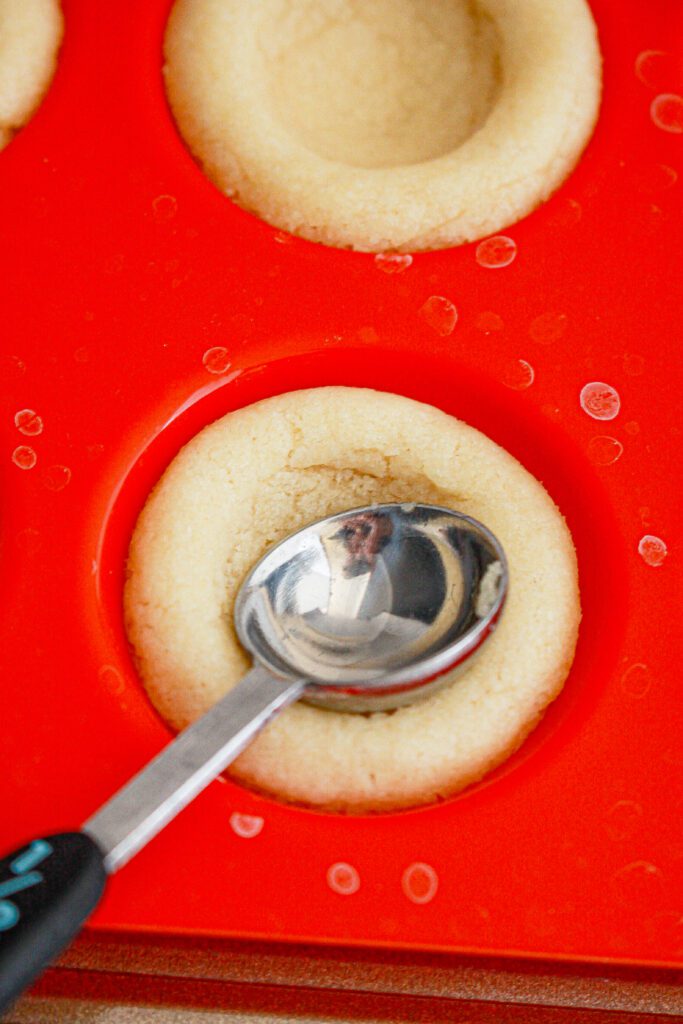
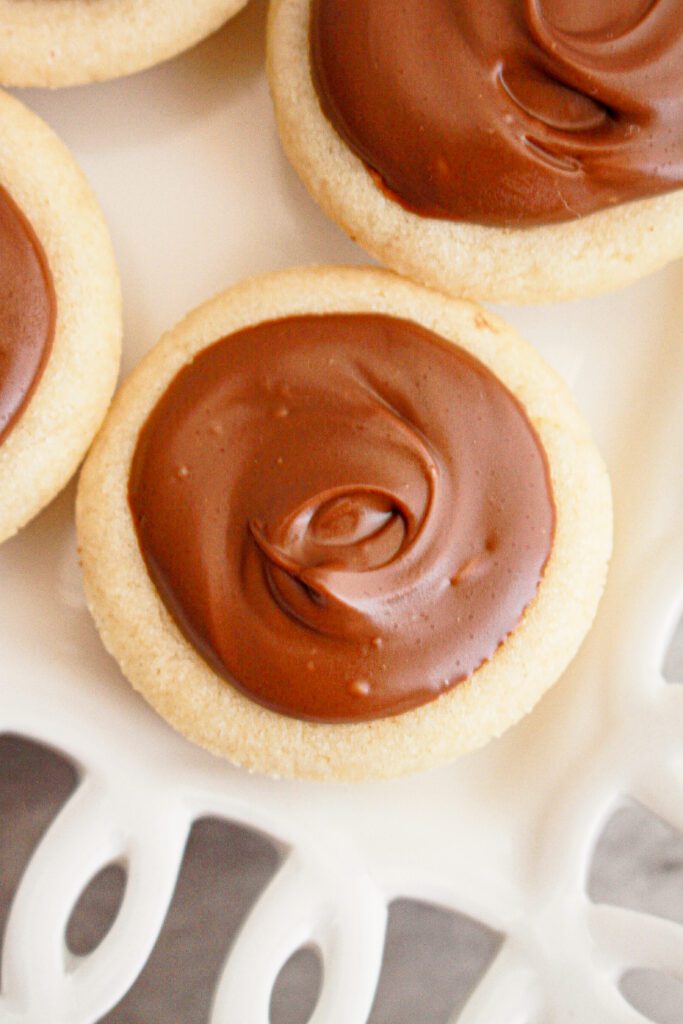
Start by preheating your oven to 350°F and greasing a mini muffin pan. In a bowl, beat the butter and sugar until light and fluffy. Add the egg white and vanilla, mixing well. Next, incorporate the salt, baking powder, and flour until the dough begins to form. Roll the dough into small balls and place them into the muffin cups, flattening slightly. Bake for 8-10 minutes until golden. As soon as they come out of the oven, press the centers down to create a well for the caramel.
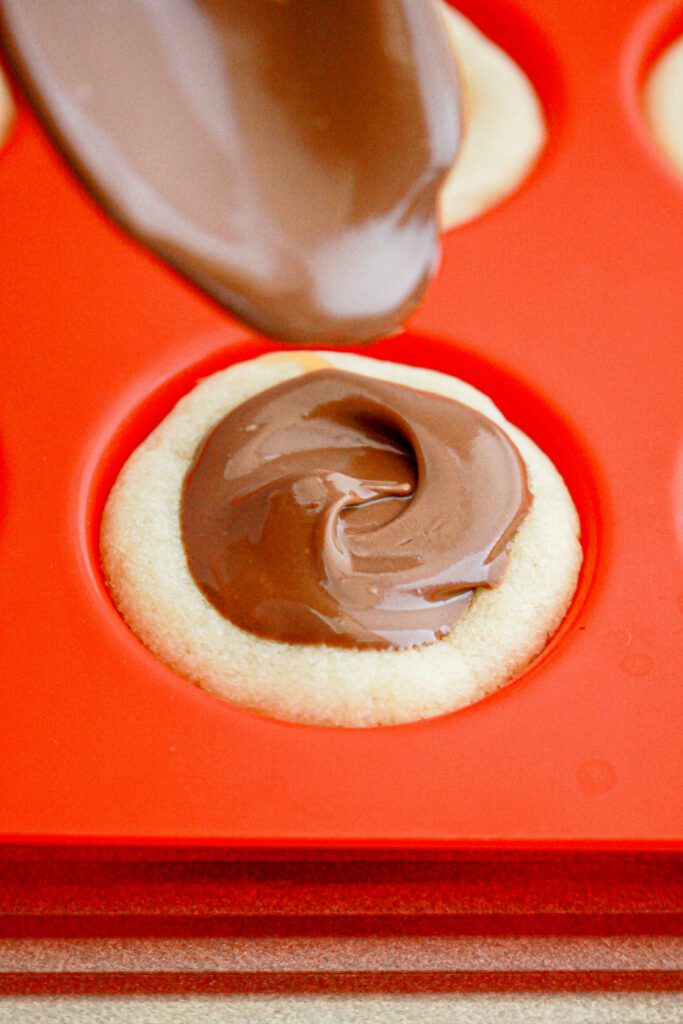
For the filling, melt the caramel squares with heavy cream until smooth, then spoon into each cookie cup. Refrigerate for 15-20 minutes to set. Finally, melt the chocolate chips with coconut oil and spread over the caramel layer. Let the chocolate set before serving.
Ways to Serve Twix Cookie Cups
These cookie cups can be enjoyed in several ways:
- As-is – Perfectly poppable and great for snacking.
- With a scoop of vanilla ice cream – The warm cookie cups paired with cold ice cream create an irresistible treat.
- Drizzled with extra caramel or chocolate – For an extra indulgent touch.
- As a party platter centerpiece – Arrange them beautifully for a dessert spread at any event.
Variations for This Recipe
Want to customize your Twix Cookie Cups? Try these variations:
- Dark Chocolate Lovers – Swap the milk chocolate for dark chocolate for a richer flavor.
- Peanut Butter Twist – Add a peanut butter layer between the caramel and chocolate for a Reese’s-inspired treat.
- Salted Caramel – Sprinkle flaky sea salt over the caramel for a gourmet touch.
- Gluten-Free Version – Use a gluten-free flour blend to make these treats accessible for everyone.
Give These Twix Cookie Cups a Try!
Now that you have the ultimate Twix Cookie Cup recipe, it’s time to get baking! Try them out and let me know how they turn out in the comments. Don’t forget to share your creations on social media and tag me—I’d love to see your delicious results! Happy baking!
- Basil Strawberries and Cream Cookies from The Spiffy Cookie
- Butter Toffee from Art of Natural Living
- Carrot Cake Shortbread from Jolene’s Recipe Journal
- Flower Pretzel Bites from For the Love of Food
- Funfetti Easter Cupcakes from Hezzi-D’s Recipe Box
- Irish Apple Cake from A Day in the Life on the Farm
- Lemon Matcha Muffins from Cindy’s Recipes and Writings
- No Bake Salted Caramel Cheesecake from A Kitchen Hoor’s Adventures
- Small Batch Carrot Cake from Cheese Curd In Paradise
- Twix Cookie Cups from Crazy For Couponing

Twix Cookie Cups
Ingredients
Method
- Directions:
- Preheat the oven to 350 degrees. Grease a mini muffin pan (unless using a nonstick pan).
- In a large bowl, beat the butter and sugar until light and fluffy. Add in the egg white and vanilla and beat. Add in the salt, baking powder and flour and beat until it starts to form a ball.
- Roll the dough into balls (about 2 teaspoons in size) and place in the muffin cups and gently flatten.
- Place in the oven and bake for 8-10 minutes, just until the edges start to turn golden brown. Remove and immediately press the centers down to form a well in the middle of each cookie (the back of a small teaspoon works well to create the indent). Set aside and let cool.
- In a microwave safe bowl, place the caramels and the heavy cream and melt in short bursts, stirring each time, until the caramel is completely smooth. Spoon about 1⁄2 – 1 teaspoon of caramel into each cookie well. Once each cookie has caramel, place the pan into the refrigerator for 15-20 minutes to set the caramel.
- In a small microwave safe bowl, melt the chocolate chips and coconut oil, stirring frequently until completely smooth.
- Spread the chocolate over the top of the caramel, and smooth with the back of the spoon. Allow the cookies to sit for 15-20 minutes for the chocolate to set before serving.
- Store any leftovers in an airtight container for up to 3 days.